Problem statement:
Grab HD clips from Sony HDR-HC7 HDV camcorder and convert them to HD videos on the web (Vimeo, YouTube, etc.) fairly easily on Linux - specifically, Ubuntu
I’ve been trying to address this problem for a while now. It has been about a year since I tried last. I remember using Kino and giving Cinelerra a shot. For variety of reasons, I did not like either and I gave up on the effort.
Recently, when Ubuntu 10.04 shipped with PiTiVi as the default video editor, I decided to give it another go. Since I had used OpenShot briefly in Ubuntu 9.10, I thought it would be educational to try both the video editors to accomplish the task. So I created a short sample video in both these editors - embedded below.
I am a video pro by no means. I am just a novice user trying hard to shoot least shaky HD movies and sharing them with family and friends - while not embarrassing myself! So please take my input and opinions with a grain of salt. But at the end of it all, I think I prefer OpenShot - at least for my camcorder, my level of skill and expertise using video editors.
Now that the result is out of the way, here’s the rest of the story …
Workflow
Workflow I would like to set up is simple:
- Grab clips from the camcorder
- Convert clips to a format the video editor likes (I would rather not, but necessary with some editors)
- Import them into the video editor
- Edit/mix the clips and compose the video
- Export it to desired target
Grabbing clips from the camcorder
This is something I learned from my previous experience with Kino. I use
dvgrab to grab clips from the
camcorder. Here is the source of the script I use:
Sony HDR-HC7 is an HDV camcorder. As such,
the above script grabs the clips in form of a sequence of MPEG-2 transport
stream (.m2t) files. I use the -timestamp option so that the names of the
files include the time when the video was recorded. I also store the output of
this script for later use. It includes useful information about the clips - like
the timecode, length of the clip in frames, size of the clip etc. Here’s a sample
output:
Using OpenShot
Importing video
One thing I really loved about OpenShot is the fact that it can consume .m2t
files! Kino did not, Cinelerra did not, PiTiVi does not. So this is great. It
completely eliminates one step in my workflow.
Import function in OpenShot (the big green ‘+’ sign in the toolbar)
allows you to add video (my .m2t files), audio and other media files.
Editing video
For a simple video, like the one I created for this experiment, all you need to do is drag the clips into the timeline - the lower part of the interface - and position them to define the sequence of scenes in the movie.
Here are some editing/mixing features of OpenShot I used in the making of the sample video:
- The razor tool can be used to snip clips at any given position
- Markers can be added on the timeline to mark significant positions in the timeline
- Video in a clip can be turned ON or OFF
- Audio in a clip can be turned ON or OFF
- Effects like Fade in/Fade out can be applied to individual tracks
- There are many transitions and effects, which I did not use in the sample video
I did not play with titles, credits or subtitles, so I cannot say much about those features. All in all, you can do some basic editing and mixing really well.
Exporting video
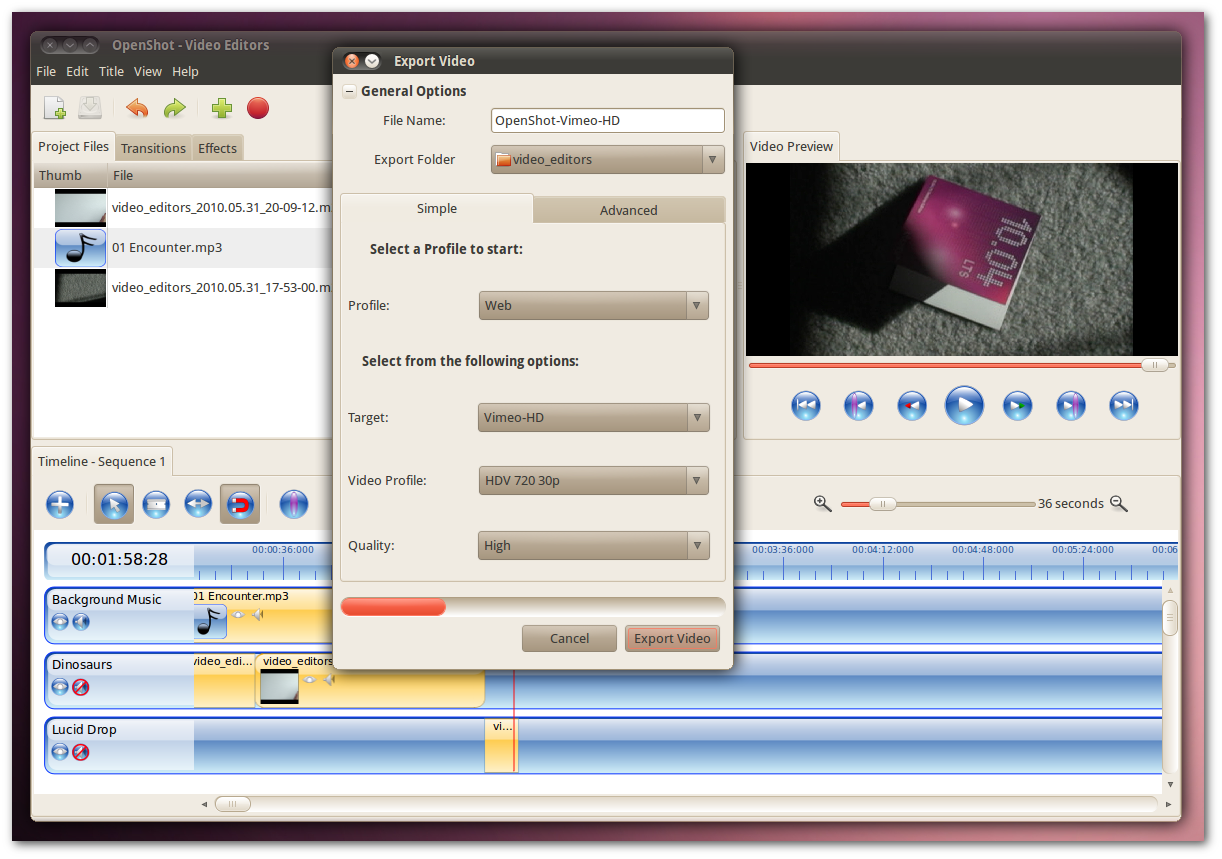
Another thing you got to love is that OpenShot comes with canned export profiles. Profiles have export parameters set to work with DVD, Web (Vimeo, Youtube and the likes) etc. The fact that export to Vimeo-HD and Youtube-HD worked so well, make me feel very optimistic about DVD export - which is going to be my next endeavor.
Here’s a screenshot of the export dialog.

And finally, here are the videos out of OpenShot, on both Vimeo (exported with Vimeo-HD profile) and Youtube (exported with Youtube-HD profile).
OpenShot Vimeo HD video:
OpenShot Youtube HD video:
Using PiTiVi
Importing video
Like I mentioned, PiTiVi does not consume .m2t files. Apparently, it has the
capability, but there’s probably a bug
currently, that keeps it from recognizing the files correctly. So there’s
hope!
But for now, you must convert the .m2t files into a format that PiTiVi can
read. I used ffmpeg to do so. Here’s the command (and its output) I
used for .m2t to .mpg conversion:
Converted .mpg files can now be imported and worked with in PiTiVi.
Editing video
Much like OpenShot, PiTiVi allows you to add video, audio and other media files to a project. You then drag the clips in the time line and position them to define the sequence of scenes in the movie.
Here are some editing/mixing features of PiTiVi I used in the making of the sample video:
- The scissor tool can be used to snip clips at any given position
- I could only add one marker (the cursor), but I am sure there is a way to add more. I just did not try to find it
- Instead of Fade In/Out effects or completely turning ON or OFF a clip, PiTiVi allows you to set track levels (brightness for video tracks, volume for audio tracks). The levels can vary through the track depending on the levels in the beginning and the end of track. I think this provides an added level of flexibility. But also, at the same time, makes simple Fade In/Out slightly harder to implement. I like it though
- Audio from a video track can be separated into an independent track. This, also, I think is a very handy feature
Again, I did not play with titles, credits or subtitles, so I cannot say much about those features. I also did not easily find any transitions or effects, that could be applied to tracks.
I had trouble synchronizing audio and video in PiTiVi (synchronizing the ‘gong’ with dropping of CD sleeve). I was finally able to synchronize the two with a lot of trial-and-error. The one that rendered kind of synchronized (one below) does not actually look synchronized in the preview. The preview in PiTiVi did not seem very accurate.
Exporting video
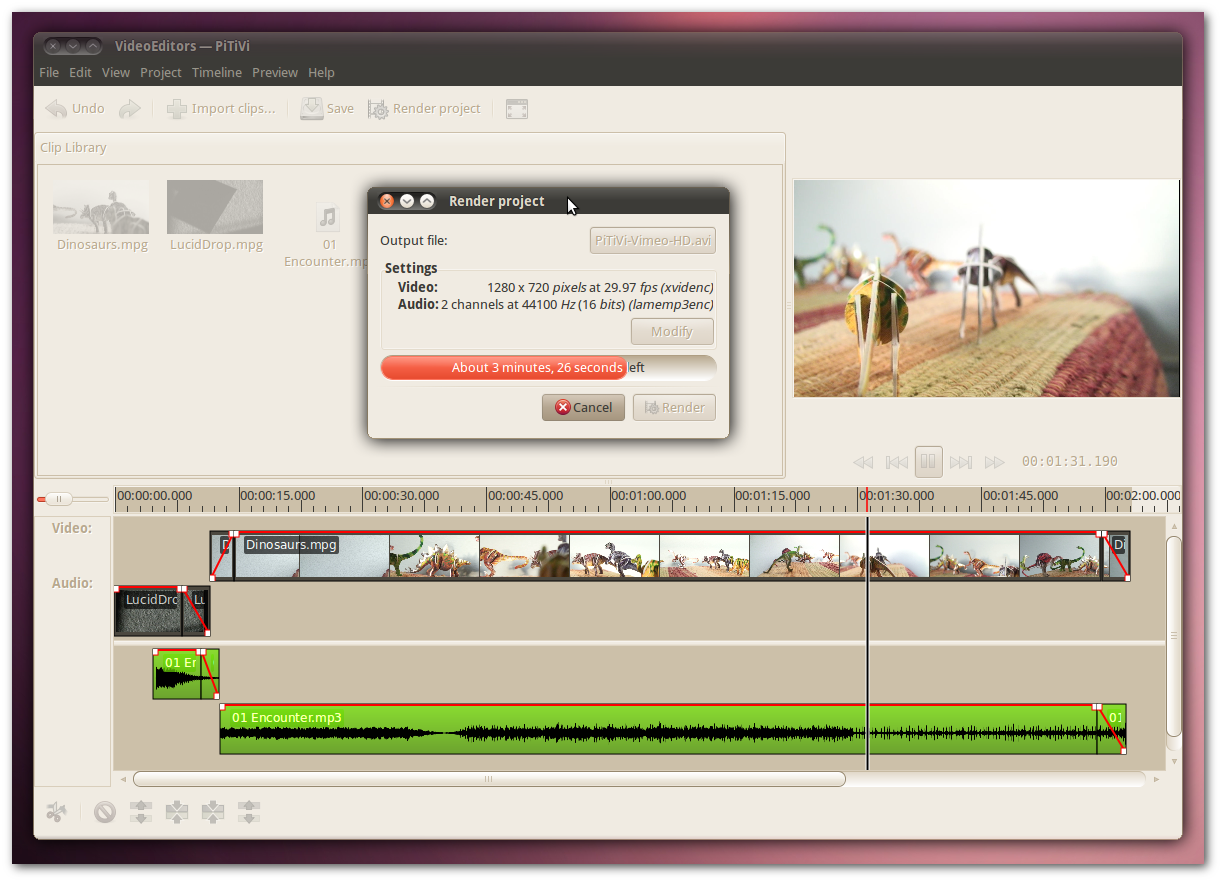
PiTiVi does not come with canned export profiles. Although I found a way to export to Vimeo-HD on the Vimeo help sites. It is left to the users to do the research. As you might notice though, the audio/video out of PiTiVi is a bit choppy at times. I probably did not get all the export parameters right. But then again, PiTiVi does not make it any easier.
Here’s the screenshot of the export dialog of PiTiVi:

And here is the resulting Video:
Conclusion
I tend to compare video editors in three different categories – Import, Editing and Export. A good video editor should support a wide variety of input formats. It should have a good balance of powerful and easy-to-use editing features. It should export video in formats that can be played flawlessly on popular targets like the Web (Youtube, Vimeo, etc.) and media players (DVD/VCD players, desktop media players, etc.).
At the time of this writing, I think OpenShot trumps in all the three categories.
- In my case, PiTiVi could not import
.m2tfiles. This added a step in my workflow. Hopefully this is temporary and will be fixed soon - PiTiVi has some neat editing features, but lack of transitions and effects shifts the balance in OpenShot’s favor. Also everything you can do in PiTiVi can be achieved in OpenShot to some extent.
- OpenShot has export profile for popular targets. This is a must for anyone who doesn’t want to get lost in the many gory details of conversion parameters and their optimal values – certainly for me
Looks like the Linux video editor scene is starting to look up. I hope it only gets better from here.
If something I mentioned in this post is inaccurate/wrong, please point it out in the comments. Hope this helps!